
How to create a vendor/seller account on Makers India?
Thinking about joining the Makers India family? Exciting!
Whether you’re a seasoned artisan or just starting your creative journey, Makers India is a fantastic platform to showcase and sell your unique products. The best part? Creating a vendor account is absolutely free!
Follow these steps to become a part of the Makers India seller community:
Step 1: Visit Makers India
Head over to the official Makers India website to get started.
Step 2: Click on become a seller button
Scroll to the bottom of Makers India website and click on become a seller button.

Step 3: Fill vendor Registration detail
In the vendor registration page, enter all the details given below

- Enter your email address: In the registration form, enter your valid email address. Make sure it’s an email you have access to, as important communications will be sent to this address.
- Choose a Unique Store Name: Pick a unique and memorable store name for your brand. This name will be how customers recognize your products on Makers India
- Set a Secure Password: Create a strong password for your account. Ensure it includes a mix of uppercase and lowercase letters, numbers, and special characters for security.
- Confirm your password: Re-enter the password in the “Confirm Password” field to ensure accuracy. This step is crucial to make sure there are no typos in your password.
- Click on the Register button: Once all the fields are filled out, click on the “Register” button to submit your registration details. This will initiate the account creation process.
Step 4: Store setup
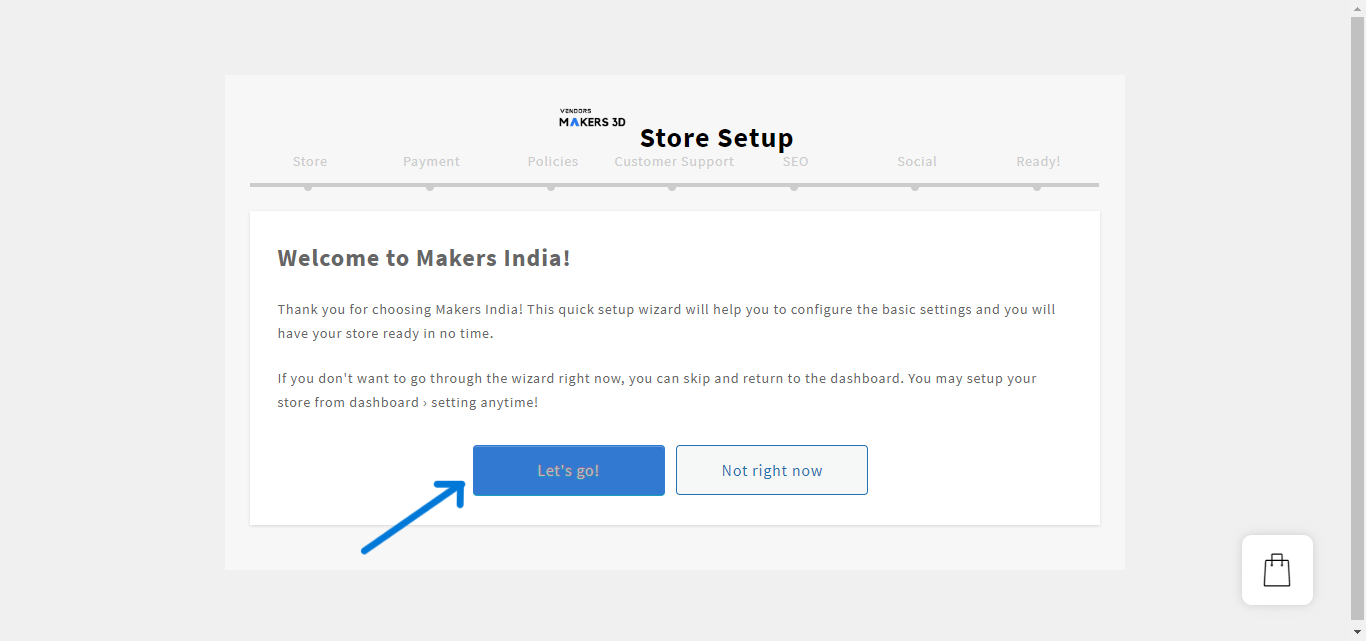
Great job on completing the initial registration! Now, let’s move on to setting up your store on Makers India. Click on the Let’s Go button to continue the store setup process.
Upon clicking “Let’s Go,” you will be directed to an intricate Store Setup Page with multiple tabs, each focusing on essential aspects of your vendor profile. This refined setup allows you to tailor your store comprehensively. Here’s a breakdown of the tabs and the details to be filled under each:

- Store Tab: Customize your store details, including a compelling description and distinctive logo that encapsulates your brand identity.
- Payment Tab: Configure your preferred payment methods to facilitate seamless transactions for your customers.
- Policies Tab: Establish clear policies for shipping, returns, and any other customer-related procedures to enhance transparency.
- Customer Support Tab: Provide information on how customers can reach out to you for assistance, ensuring a responsive and supportive customer experience.
- Social Tab: Integrate your social media profiles to enhance your store’s online presence and connect with your audience across various platforms.
Under each tab, meticulously fill in the required details as we guide you through this article. This step-by-step approach ensures that your store is not only visually appealing but also aligned with best practices for effective online selling.
1. Store tab
Certainly! Here’s a step-by-step guide for filling in the details under the “Store” tab:
- Upload Logo: Click the “Upload Logo” button to showcase your brand. Choose a high-quality image that represents your store effectively.
- Upload Banner (Size 1650*350): Select “Upload Banner” to feature a visually appealing header for your store. Ensure the image dimensions are 1650 pixels wide and 350 pixels tall.
- Shop Name: Enter your unique shop name. This is the identifier customers will use to find your products on Makers India.
- Store Email: Provide a valid email address associated with your store. This will be used for communications and order notifications.
- Store Phone: Enter your store’s contact number. This can be crucial for customer inquiries and support.
- Store Address 1, Store Address 2: Input your complete store address, including any additional details (e.g., suite or floor numbers).
- Store City/Town: Specify the city or town where your store is located.
- Store Postcode/ZIP: Enter the postal code or ZIP code for your store location.
- Store Country: Choose the country where your store is based.
- Store State: Select the state or region corresponding to your store’s location.
- Find Location: Click on “Find Location,” if available, to automatically populate the location based on your entered address.
- Shop Description: Craft a compelling shop description that provides customers with insights into your brand, products, and the unique experience your store offers.
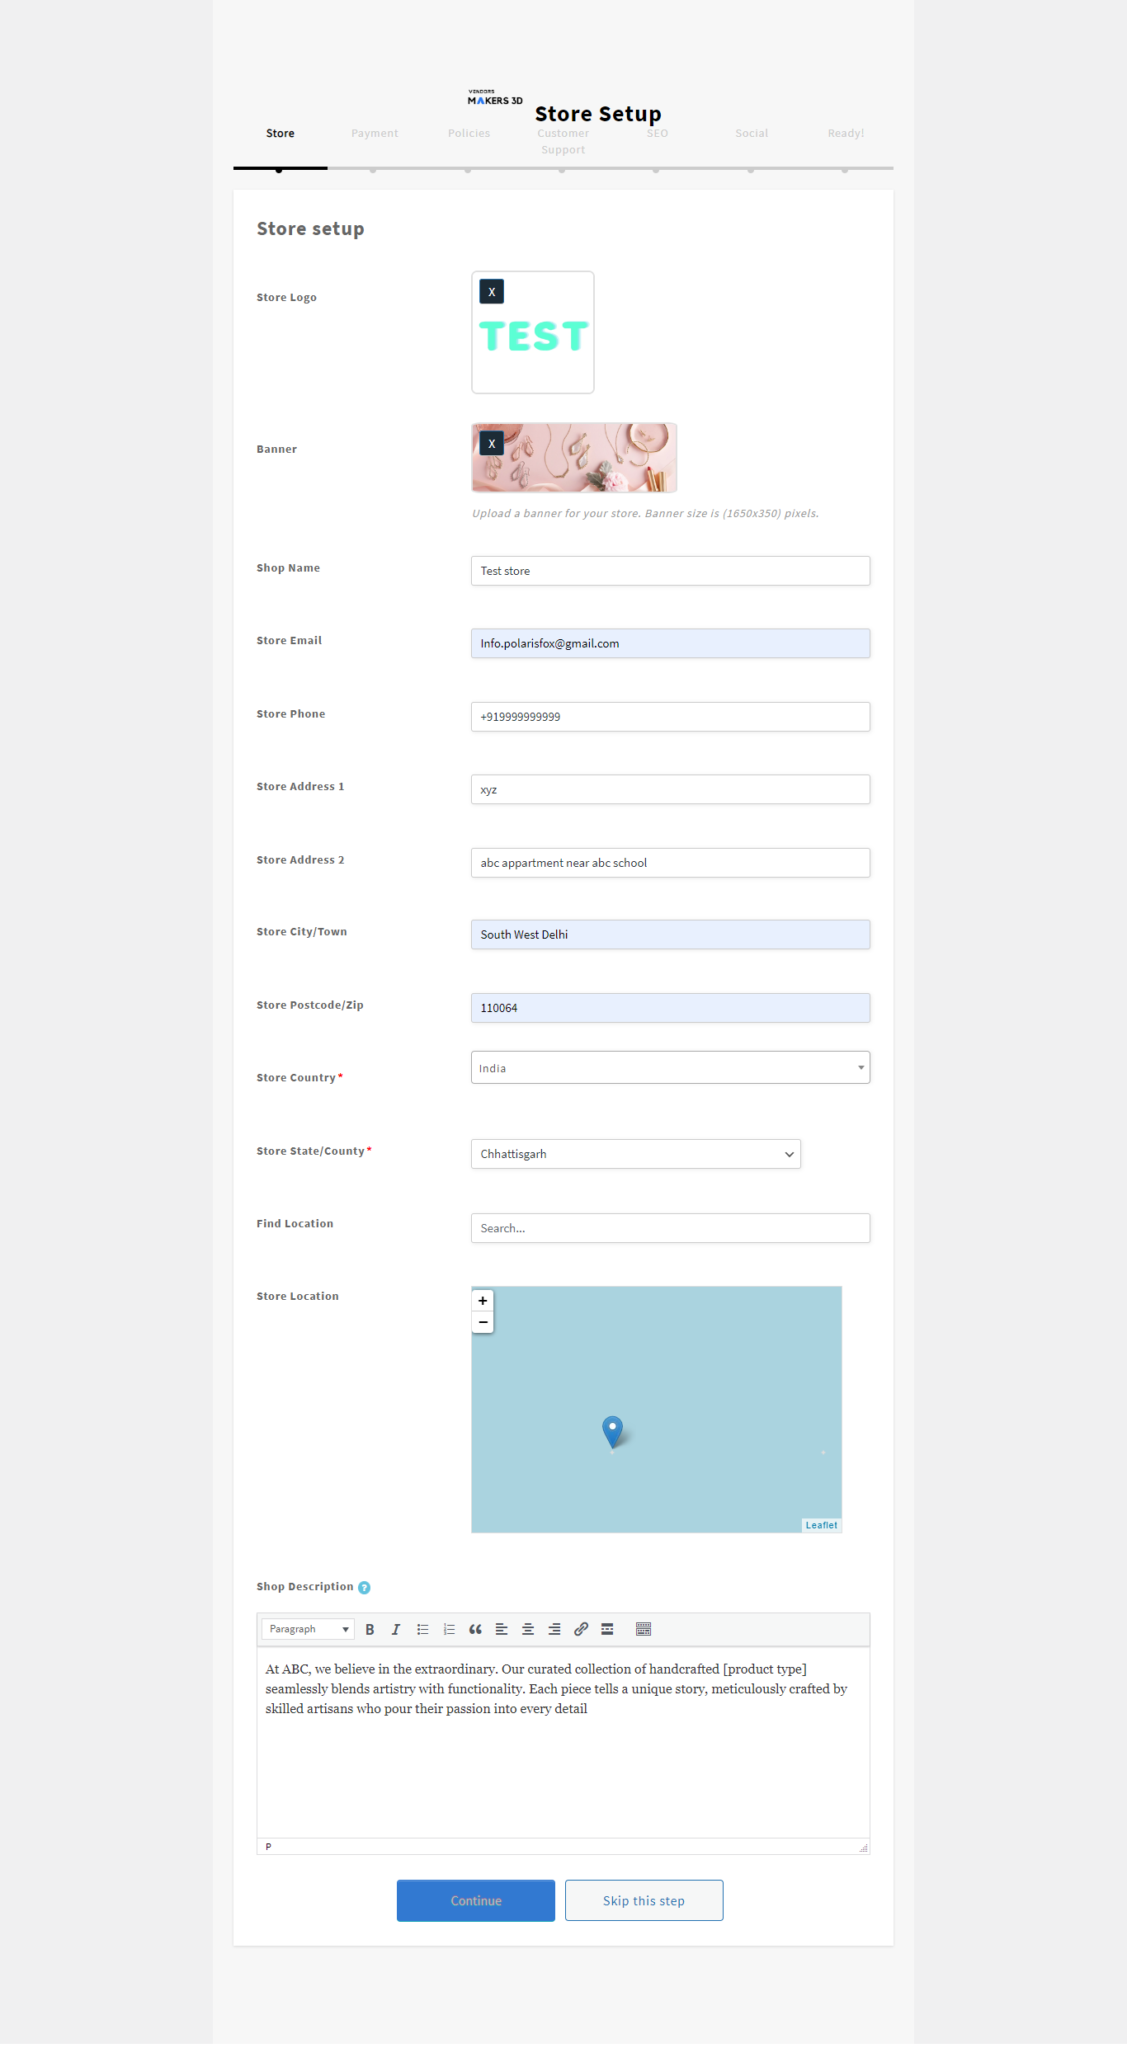
Once you’ve filled in these details, review and save your changes. This meticulous setup ensures that your store is not only visually appealing but also accurately reflects your brand identity and contact information.
2. Payment tab
Welcome to the Payment Setup section of your vendor account on Makers India. Here, you’ll configure how you want to receive payments for your products. Follow these steps to set up your payment preferences:
1. Cash on Delivery (COD):
- If you want to enable Cash on Delivery for your orders, simply check the box provided. This option allows customers to pay in cash upon receiving their orders.
2. Choose Payment Method:
Select your preferred payment method.
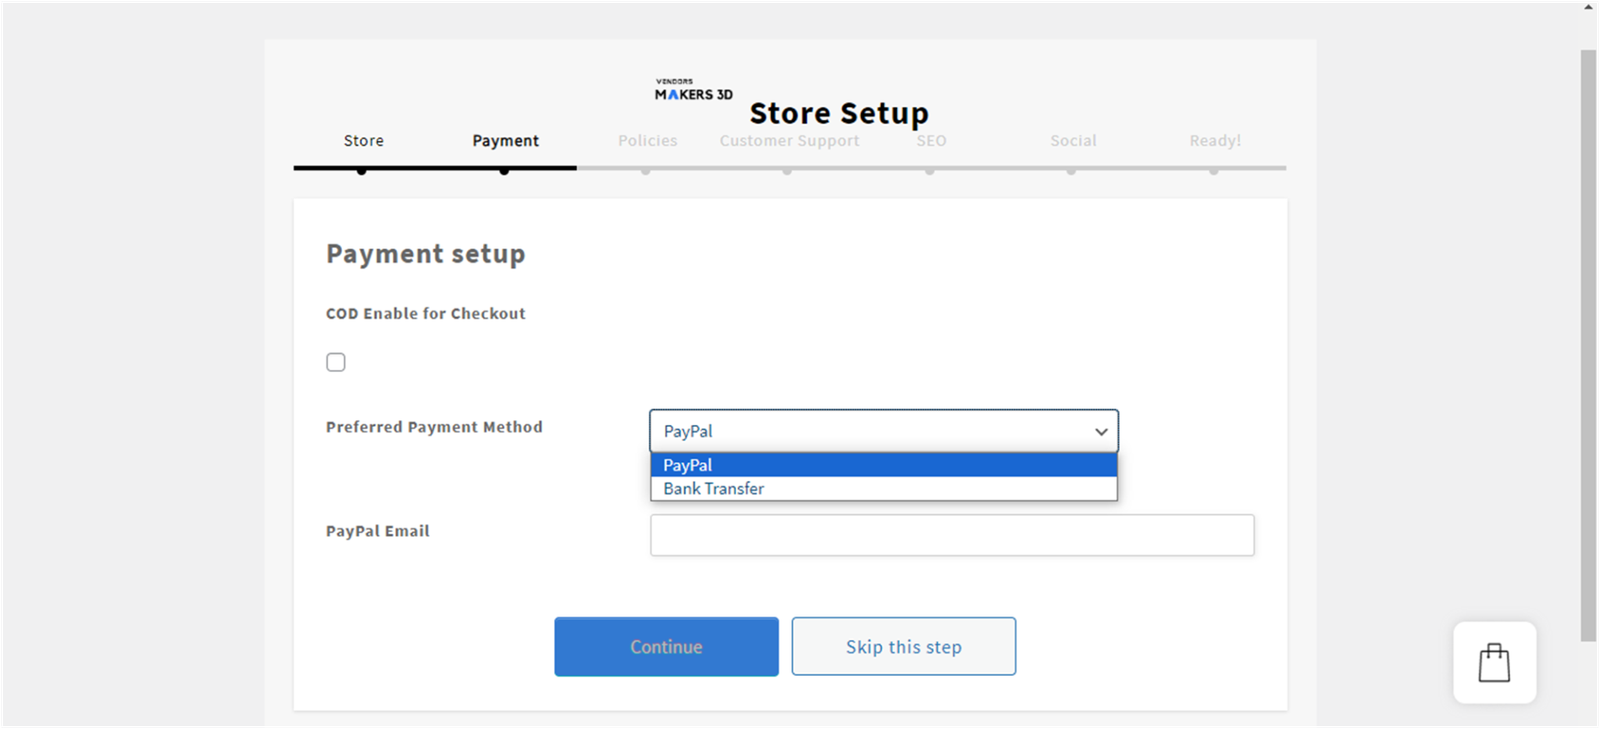
- PayPal: If you choose PayPal , you’ll need to provide your PayPal email address.

2. Bank transfer: If you prefer bank transfers, fill out the following details to receive payments:
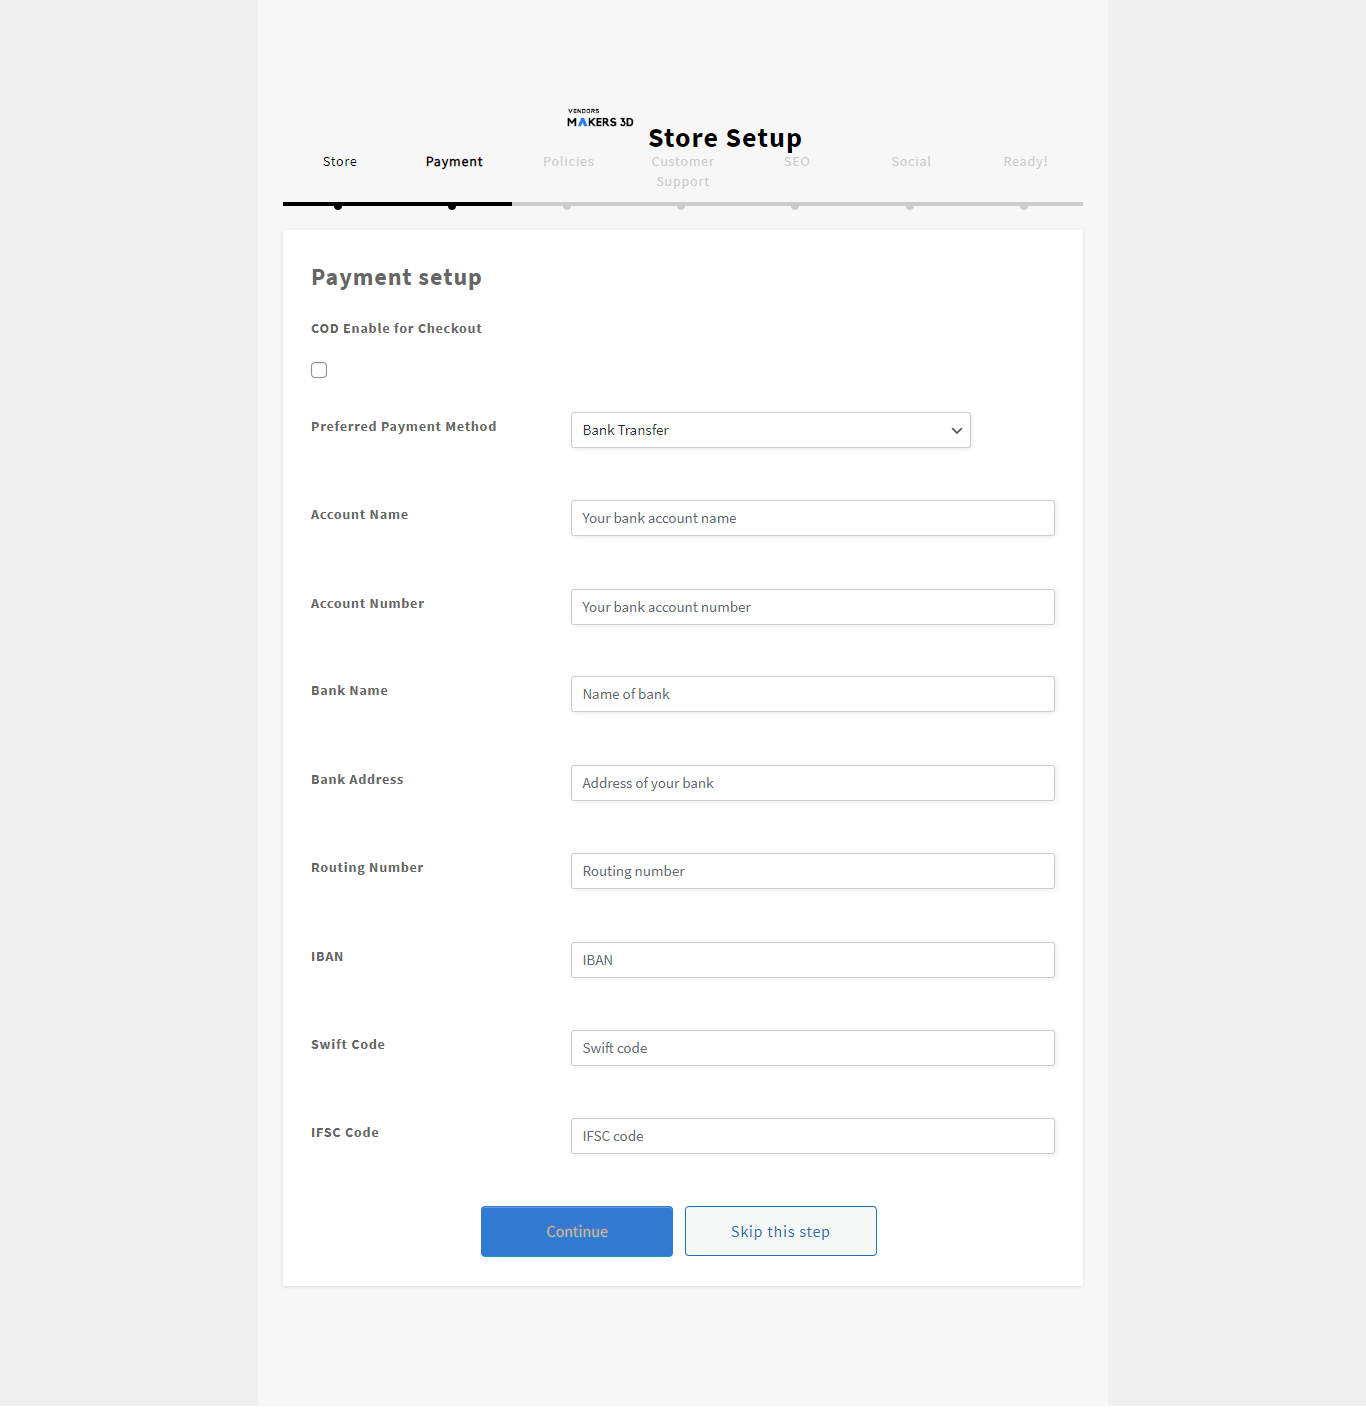
- Account Name:
- Account Number:
- Bank Name:
- Bank Address:
- Routing Number (if applicable):
- IBAN (for international transfers):
- SWIFT Code (for international transfers):
- IFSC Code (for Indian bank accounts):
Ensure that all details are accurate to facilitate smooth transactions. If you have any questions about these details, consult your bank or financial institution.
3. Continue: Once you’ve filled in your payment preferences, click “Continue” to update your payment settings.
Important Notes:
- Double-check your PayPal email or bank details to avoid payment processing issues.
- If you’re choosing bank transfer, be sure to provide accurate and complete information to avoid delays.
By setting up your payment preferences, you’re one step closer to managing your online transactions seamlessly.
4. Customer support tab
In the “Customer Support” tab of your vendor account on Makers India, you can provide essential contact information for your customers. Follow these steps to set up your customer support details.
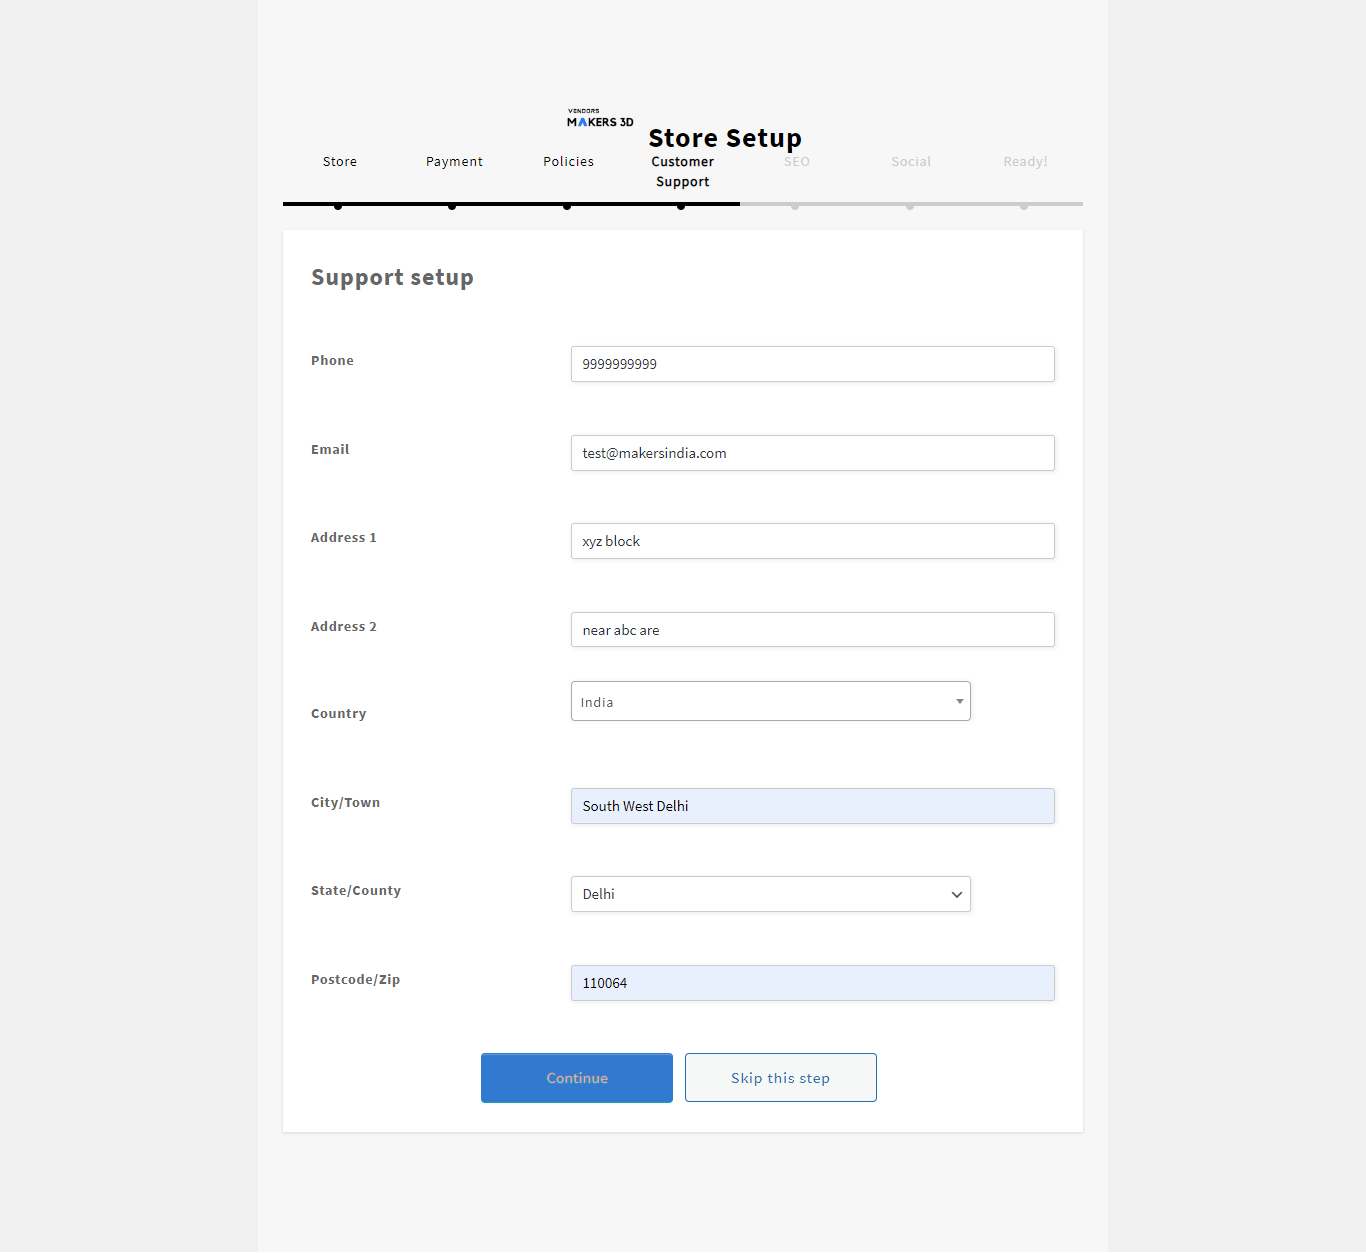
Phone: Enter your dedicated customer support phone number. This should be easily accessible and monitored regularly for customer inquiries and assistance.
Email: Provide a valid customer support email address. This email will be a direct channel for customers to reach out with questions, concerns, or feedback.
Address: Input your business address. This helps customers know the physical location of your business and can be beneficial for shipping-related queries.
Country, City, State, and Zip Code: Specify your business location details, including the country, city, state, and postal code. This ensures accurate information for customers and shipping purposes.
5. SEO tab

Store SEO setup
In the “Store SEO” section of your vendor account on Makers India, you have the opportunity to optimize your store for search engines. Follow these steps to enhance the visibility of your store in search results:
1. Store Title: Craft a compelling and concise store title. This is a crucial element that reflects your brand and helps search engines understand the focus of your store.
2. Meta Description: Write a captivating meta description. This brief summary provides potential customers with a glimpse of what your store offers. Aim for clarity and relevance.
3. Meta Keywords: Add relevant meta keywords that represent your store and products. These keywords help search engines understand the context of your store and improve its discoverability.
Facebook setup
- Facebook Title: Set a captivating title for your store on Facebook.
- Facebook Description: Craft a brief and engaging description for your store on Facebook.
- Facebook Image: Upload an eye-catching image that represents your store on Facebook.
Twitter setup
- Twitter Title: Set an attention-grabbing title for your store on Twitter.
- Twitter Description: Craft a concise description for your store on Twitter.
- Twitter Image: Upload a visually appealing image that represents your store on Twitter.
5. Social Tab
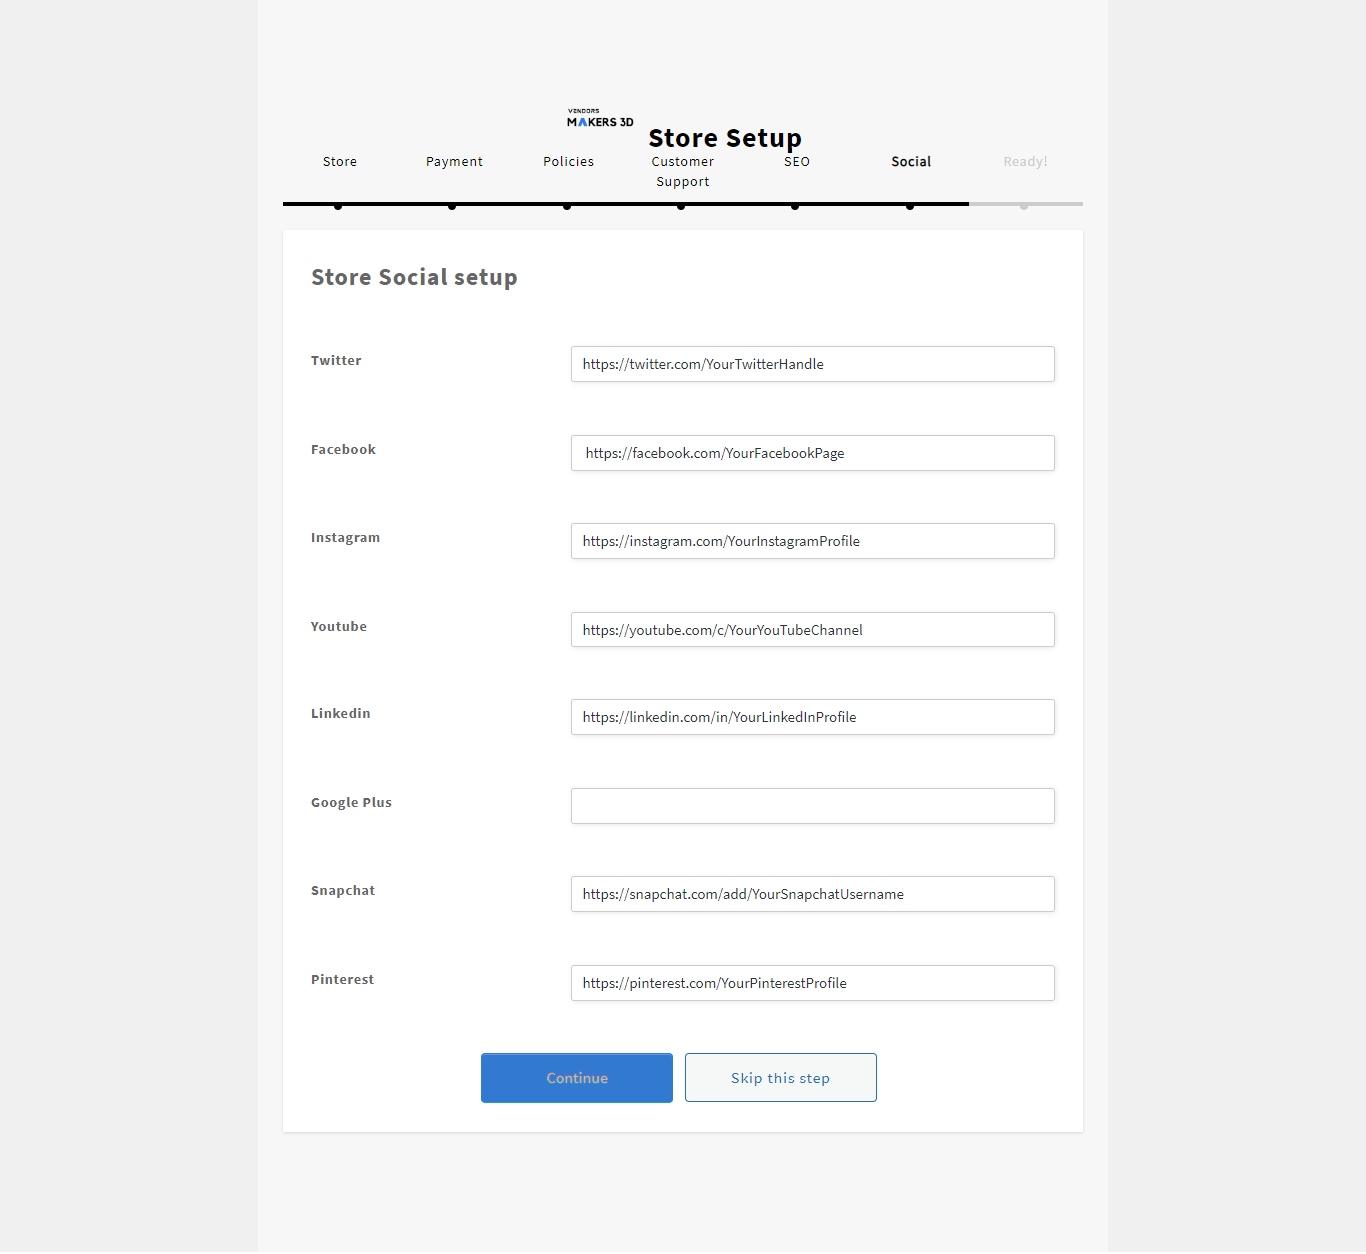
In the “Social” tab of your vendor account on Makers India, you can effortlessly connect with your audience by adding links to various social media platforms. Simply enter the respective links for your Twitter, Facebook, Instagram, YouTube, LinkedIn, Google Plus, Snapchat, and Pinterest profiles. Ensure consistent branding across platforms, and actively engage your audience with regular updates. Verify the accuracy of the provided links to guarantee seamless access to your official profiles. After adding your social media links, click continue to update them on your vendor profile
Congratulations! 🎉 You’ve successfully completed the setup of your store and seller registration on Makers India. By clicking “Continue,” you’ll be redirected to a confirmation page, signaling that we’re done with the initial setup.
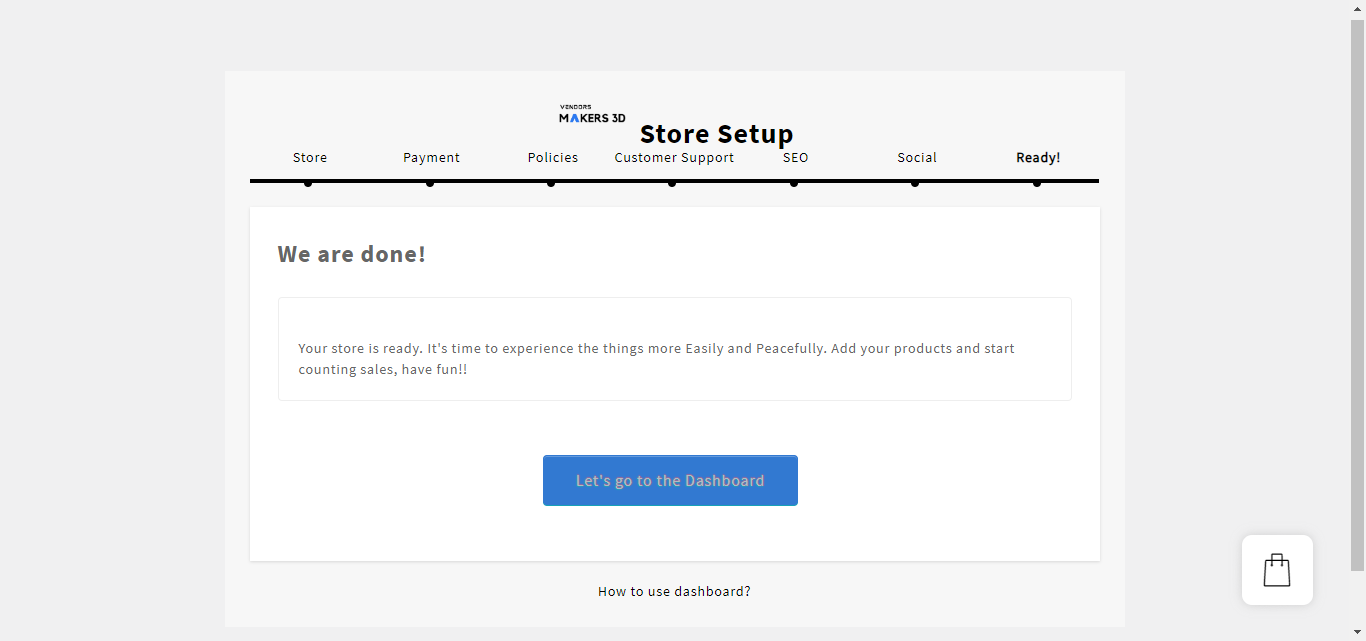
Next Steps:
- Confirmation Page: Upon reaching the confirmation page, you’ll see the option to “Go to Dashboard.”
- Seller Dashboard: Click on “Go to Dashboard” to explore and familiarize yourself with your seller dashboard. The dashboard is your central hub for managing orders, updating product listings, and tracking your store’s performance.
- Go through this article (Makers India seller dashboard tutorial) to learn how seller dashboard works.
Need Assistance?
- If you have any questions or need assistance, contact our customer service team, or you can also mail us at support@makersindia.in . We’re here to support you in maximizing your success on Makers India
Thank you for choosing Makers India! We wish you a prosperous and fulfilling journey as a seller on our platform.
Happy Selling! 🚀